728x90
hello-spring/src/main/java/hello.hellospring/controller/HelloController.java 클래스 작성
package hello.hellospring.controller;
import org.springframework.stereotype.Controller;
import org.springframework.ui.Model;
import org.springframework.web.bind.annotation.GetMapping;
import org.springframework.web.bind.annotation.RequestParam;
import org.springframework.web.bind.annotation.ResponseBody;
@Controller
public class HelloController {
@GetMapping("hello")
public String hello(Model model) {
model.addAttribute("data", "spring!!");
return "hello";
}
@GetMapping("hello-mvc")
public String helloMvc(@RequestParam("name") String name, Model model) {
model.addAttribute("name", name);
return "hello-template";
}
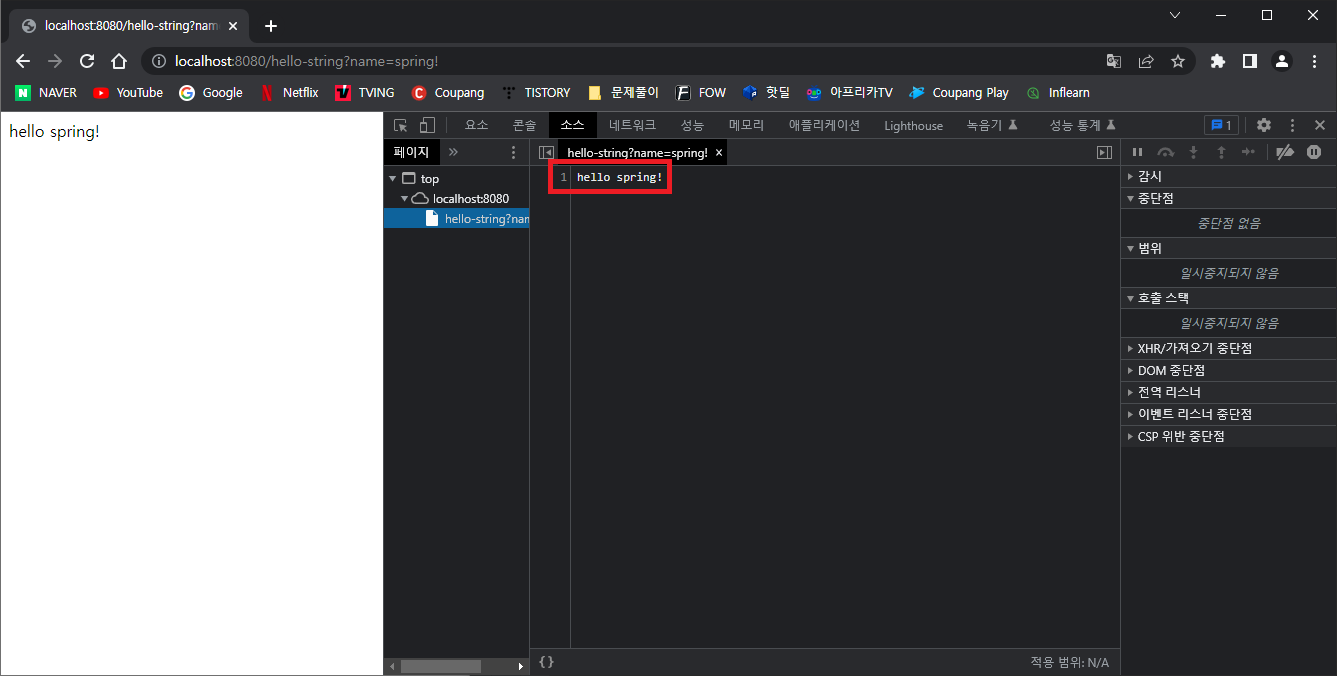
@GetMapping("hello-string")
@ResponseBody
public String helloString(@RequestParam("name") String name) {
return "hello " + name;
}@ResponseBody 애너테이션은 HTTP 바디부에 데이터를 직접 넣어주겠다는 의미
API는 템플릿 엔진 방법과는 달리 view가 없어 HTML 태그 없이 소스에 문자가 그대로 넘어가는 것을 볼 수 있다.
만일 데이터를 가져오고싶다면 어떻게 해야할까?
다음 코드를 추가해보자.
    ...
    @GetMapping("hello-api")
    @ResponseBody
    public Hello helloApi(@RequestParam("name") String name) {
        Hello hello = new Hello();
        hello.setName(name);
        return hello; // 문자가 아닌 객체를 전달
    }
    ...
그리고 getter/setter를 추가한다.
    static class Hello {
        private String name;

        public String getName() {
            return name;
        }

        public void setName(String name) {
            this.name = name;
        }
    }
}
결과는 다음과 같이 JSON 방식으로 출력된다.
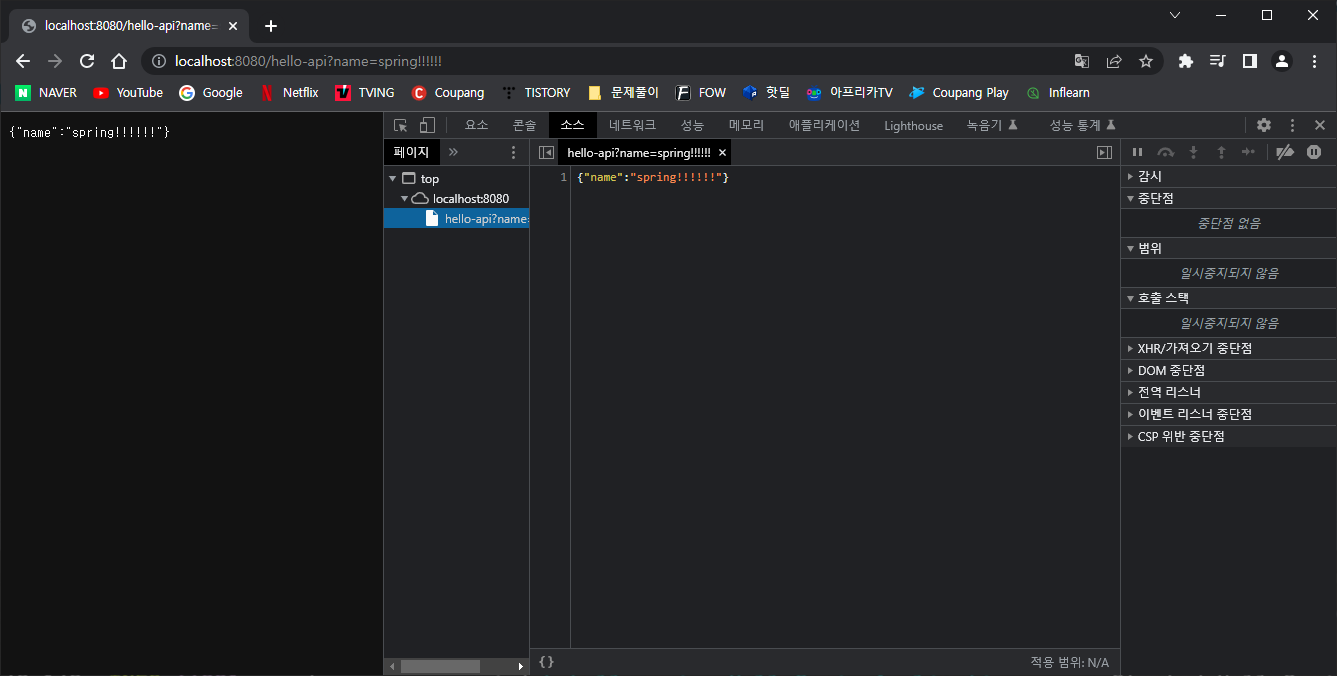
'@ResponseBody'를 사용하고, 객체를 반환하면 객체가 JSON으로 변환된다.
ResponseBody 사용 원리 그림 첨부하기
- '@ResponseBody'를 사용
- 문자로 들어온 경우 -> HTTP의 BODY에 문자 내용을 직접 반환
- 'viewResolver' 대신에 'HttpMessageConverter'가 동작
- 기본 문자처리: 'StringHttpMessageConverter' 라이브러리
- 기본 객체처리: 'MappingJackson2HttpMessageConverter' 라이브러리(객체를 JSON으로 반환)
- byte 처리 등등 기타 여러 HttpMessageConverter가 기본으로 등록되어 있음
728x90
'스프링 부트 > 스프링 입문 - 코드로 배우는 스프링 부트, 웹 MVC, DB 접근 기술' 카테고리의 다른 글
| 9. 회원 도메인과 리포지토리 만들기 (0) | 2023.03.07 |
|---|---|
| 8. 비즈니스 요구사항 정리 (0) | 2023.03.07 |
| 6. MVC와 템플릿 엔진 (0) | 2023.03.07 |
| 5. 정적 컨텐츠 (0) | 2023.03.07 |
| 4. 빌드하고 실행하기 (0) | 2023.03.07 |